Jump to content

cruz831

Members
  • Posts

    16
  • Joined

  • Last visited

Everything posted by cruz831

  1. Yes - but just as we finished our latest rod - so I haven't been able to do much with them. I figured you would just clip off some line - thanks for putting beads on them! We have some plans for a few other rods, so these will help quite a bit. Thanks again!
  2. Thanks for the line - makes pulls much easier!
  3. We finished up our first complete rod build this weekend. We are very happy with how it looks and I found it pretty easy to build compared to renovating the original rod above. Working with all new parts is easier - and a fresh clean blank makes the guides and finish epoxy turn out much better! After some test casting with the rod in the street it seems to work great. We started with a 2 piece 6'6" ML "New Old Stock" St. Croix blank that we won on the auction site. We are looking forward to fishing with it soon. I think it feels more like a Medium rod, and with the measurements of the blank it matches up to more of a Medium rod than a Medium-Light. We already have some plans for a couple of other rods....uh oh
  4. Thanks - we did this wrap at the end since I had it done all red at first - after doing the tiny ones it was soooo much easier!
  5. Yes - using a smooth line to do the pull loops made things more manageable. I am sure something like nanofil (if I had any) would be even better. Planning on getting some Fireline at some point - but for now we are a all mono household!
  6. Here is a photo of the main Microwave guide and wrap - this one looks pretty good - the others are similar. I can see lots of little defects and some problems here and there. This rod was the perfect vehicle to get our feet wet doing this type of work. I doubt I will ever get to the level and beauty of what I see on the rod building pages - but if my son gets a bit more of a desire to do this stuff I am sure he will. Time will tell. We are already working on a new complete rod right now. We have it laid out and the guides and handle all placed. I will need to make a couple of delrin winding checks this weekend and then we should be ready to start epoxying things together.
  7. We were able to get the rod wrapped - and it now has one coat of wrap epoxy on it. We cut off a few thread bumps and sanded the first coat - so that when it warms up today we can do a final thread coat. I learned quite a bit during this process. 1. It is much easier to do one color! 2. It is easier to wrap the larger guides - the smaller diameter of the rod near the tip makes the wrapping a little bit harder and the thread wants to jump off a bit more - plus keeping the thread under tension on the small end is more difficult as the blank flexes... 3. Metallic thread is even harder to handle on the smaller guides. 4. Getting the thread pulls for tie offs to work well is a bit of a challenge so far - keeping the thread tight and the pulls hidden is not very easy. If I was trying to keep the thread tight on the smallest guides I broke a few pulls - so I switched from using nylon thread for the pulls to some mono. It is quite a fun challenge doing this - and the ability to do inlays and multiple colors will require much more practice. I will post a few photos after we do the second epoxy coat.
  8. Full garage of bikes - custom steel...Mtn, Road, SS, Cross, you name it.
  9. Update: I Was able to get the guides taped onto the blank today after finishing a wood wrapping jig and turning setup. I did a static test - and to be honest it looked pretty good using the 7ft measurements on the American Tackle Chart (the rod I am using is 6'10") - I am sure I could add one additional guide and even it out just a bit more, but there is very little runout with the way it is set right now. I think when the next complete rod build project happens we can do a bit more on perfecting the placement of the running guides. For now I am sure it will work pretty well. Now I just need to decide what color and pattern to use on the guide wraps and start that process...
  10. I got one of these rods for my 7 year old son last year in 6'0" Med - it isn't much of a rod, but is good for the ponds and some boat salt fishing... I have a much nicer Fenwick Silverhawk 6'6" ML I got around the same time - it is such a better rod. I was looking at the Shimano Clarus and decided on the Fenwick since it was on sale for a lower cost. Since then I have seen the Shimano Clarus rods on sale for around $50... I think you need to get into the $50 and up range to get even a decent rod - and if you find a more expensive rod on sale/closeout it is an even better option!
  11. Thanks - seems like the smart choice is to stick with guides with inserts. Who knows it might even become my favorite fishing rod .
  12. As a follow up, is there a consensus on using Airwave guides vs Microwave guides? Since this our first rebuild project - it could easily go sideways and having less invested is a plus in that case. However, since we have had luck re-wrapping already, therfore having the Duralite Microwave guides would make it a nicer finished rod for only around $20 more... I haven't used a rod with SS hard chrome inserts before - I am used to alconite and aluminum oxide guides on my rods. This rod will probably be fished with mono for the beginning of its life.
  13. Thanks for the tips - that is exactly what I was hoping for! I was looking at the American Tackle guide spacing layout chart for a 7ft rod, and was pretty sure I would just follow that. I did see some posts on static load testing, and will look at doing that for the running guides. I didn't know that the thread could be too tight and potentially break the rod - I will certainly keep an eye on that!!!
  14. After reading this site and a few others regarding rod repairs, rod building, and custom rods etc, I decided to embark on a project to modify one rod of a pair of identical rods I have. Recently I found a really good deal on some lower end 7ft medium fast spinning rods - the cost at the time was reasonable for a pair of the rods and I thought it would be nice to have some lower cost rods to bang around for both my son & I. When I received the rods one was damaged and had a bent guide as well as a cracked guide. After talking to the seller he refunded me most of the cost of both rods due to the damage. So we ended up with one good rod and one slightly damaged rod for $23 total - which is where this project got its start. 
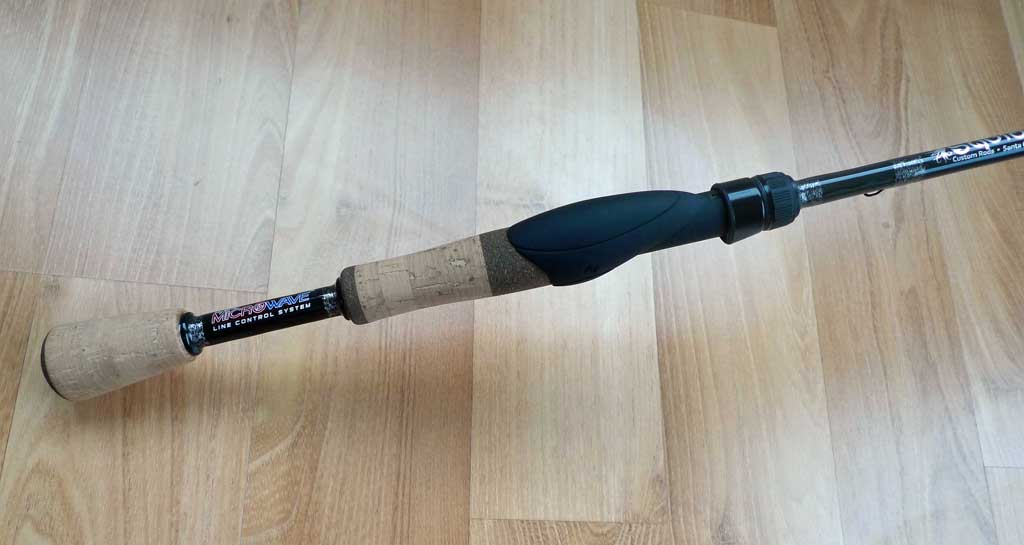
I have been interested in the Microwave spinning guide setup and have been looking for a rod at a reasonable cost to try this concept out. After doing my first rod repair to replace a broken guide a few weeks ago I discovered that I could handle doing simple thread wrapping. At some point my son and I want to build a custom rod, but aren't in a big hurry. With this new set of rods I now have the perfect candidate to a do a side by side comparison of the Microwave guide system for very little cost. I will just need a set of guides, some thread (black is all we have so far), and a simple thread wrapping jig and possibly a drying setup. Seems like a fun project with no real downside, beyond time. 
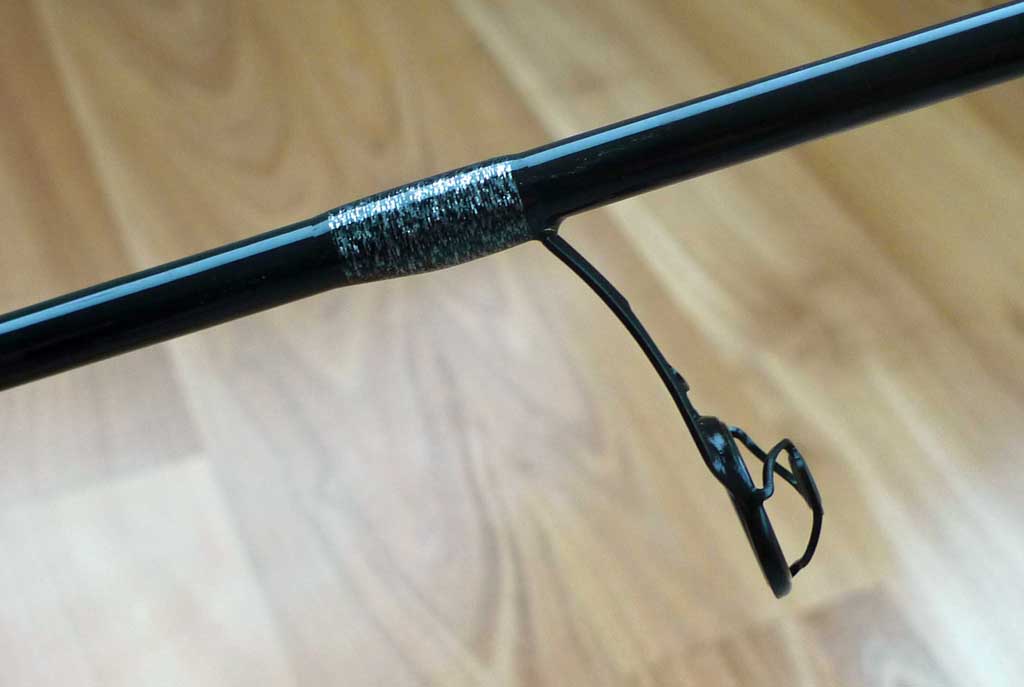
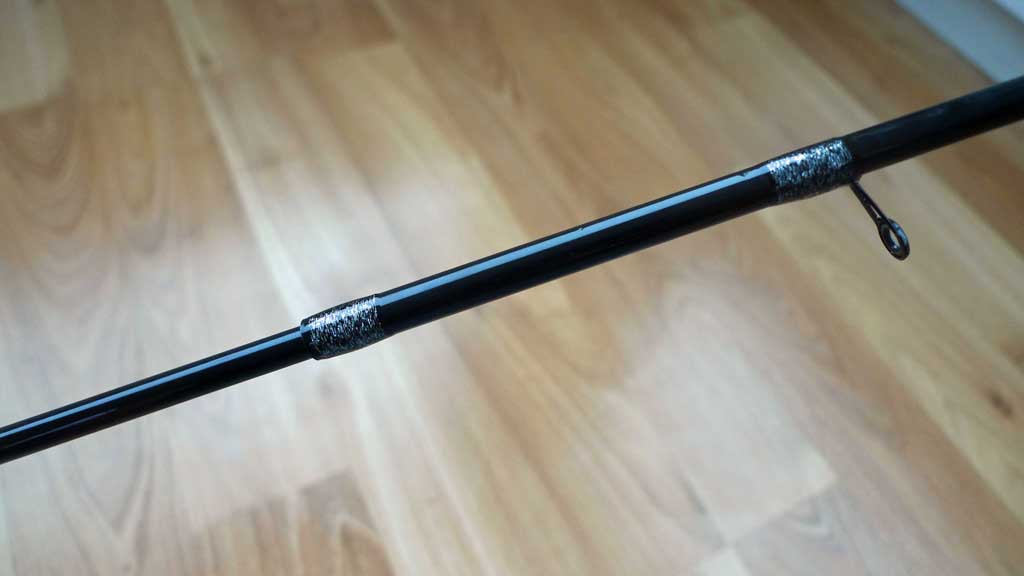
Today we decided to strip the guides off of the damaged rod. The rod has a flat black finish around the guides so it was pretty easy to use some 1500 grit sand paper to clean up the area where the old guides were. 
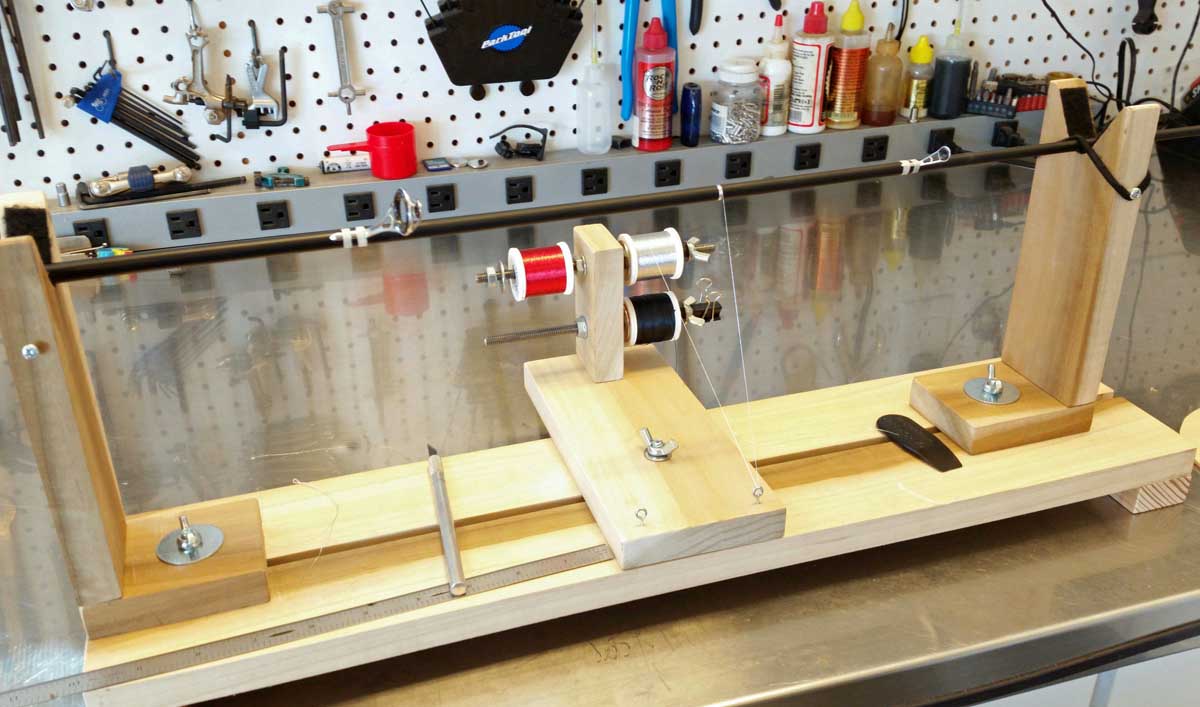
We are going to build a simple wrapping jig in the next few weeks, and also order some black airwave or microwave guides and hopefully get them installed at some point! Below is a picture showing the rod with the guides removed side by side with the good rod. The epoxy is gone, and the finish on the rod at this point is decent. By the time we get done with the new guides I doubt it will be too obvious where the old ones were. Of course this ins't a high end rod, or a perfect finish now, but for what it is going to be used for I think it will work just fine... This will also get our feet wet a bit more and get us closer to being able to tackle a custom rod build at some point in the future. Anyone who has any tips or suggestions is welcome to send them our way - we certainly can use any help offered. This site has been great for seeing all the amazing jobs and the artistic rods people can build.
  15. Thanks everyone... I am surprised at my sons interest in fishing, based on how little we have actually caught up to this point. It is kind of inspiring. He really likes being out on a pond or at the beach just being there...casting a line, talking about whatever is going on, putting his rod up on his shoulder while he retrieves - just being a kid. I was the same way as an older kid - but I am still surprised that he is the same (go figure). He will talk about how the best part of his day was fishing even when nothing was caught! I kind of feel guilty inside since I am so far 30 years removed from bass fishing that I need to remember how to tie a lure! I am trying to re-learn what to use etc, etc. I guess at this point I know more than my dad showed me! So I have that going for me...
  16. Hello, New user of the site - have been lurking around for a while, and finally decided to bite the line and sign up... 30+ years removed from some serious bass fishing when I was young - now getting back into more serious fishing with my son. He loves to fish and so I am getting back into it. I bought him a starter fishing setup when he turned 6 and he and I have done a bit of fishing off and on since then. Once he told how much fun it was for him, I started to get the bug again. Christmas this year was an opportunity to get him a new spinning rod & reel plus some tackle gear. We have a local pond in the neighborhood that is just for kids - I used to fish there when I was young, but I am at a loss how to fish it now. It should have some LM bass still...I need to refigure how to catch them. I was always a spinner bait, jig and lure fisher - I need to learn the plastic options - wacky rigs, senkos, swim baits etc... In addition, we are doing some ocean fishing as we are on the coast - so we have the opportunity to fish for surf perch, rock fish, salmon etc... Just wanted to say hello.
×
×
  • Create New...

Important Information

We have placed cookies on your device to help make this website better. You can adjust your cookie settings, otherwise we'll assume you're okay to continue.